I find a digital image, print the image, and then transfer it onto an art board. From there, I paint on it with acrylic paints and then create additional layers by adding collage. I have also been taking photos of the paintings and then continuing to work on the image within Illustrator. Then I print the Illustrator artwork, collage it on to the painting, and continue the process until I am satisfied with the results. Because this process involves both real-space artwork and virtual-space artwork, I have a series of digital images as well as the final painting.

Saint Lucy, by Eliza
For the workshop, I selected a collection of interesting photographs from Shorpy.com. The students could either draw and collage directly on the printed black and white photos, or download the image file and begin altering the image digitally. Then they could print their images, take photos of them, and continue the process using collage.
The first day, students seemed to get a slow start, and on the second day they got going right away and they made rapid progress!
Natalia used the collage technique on a digital image of a child in a forest. It has a fairy tale feel to it.
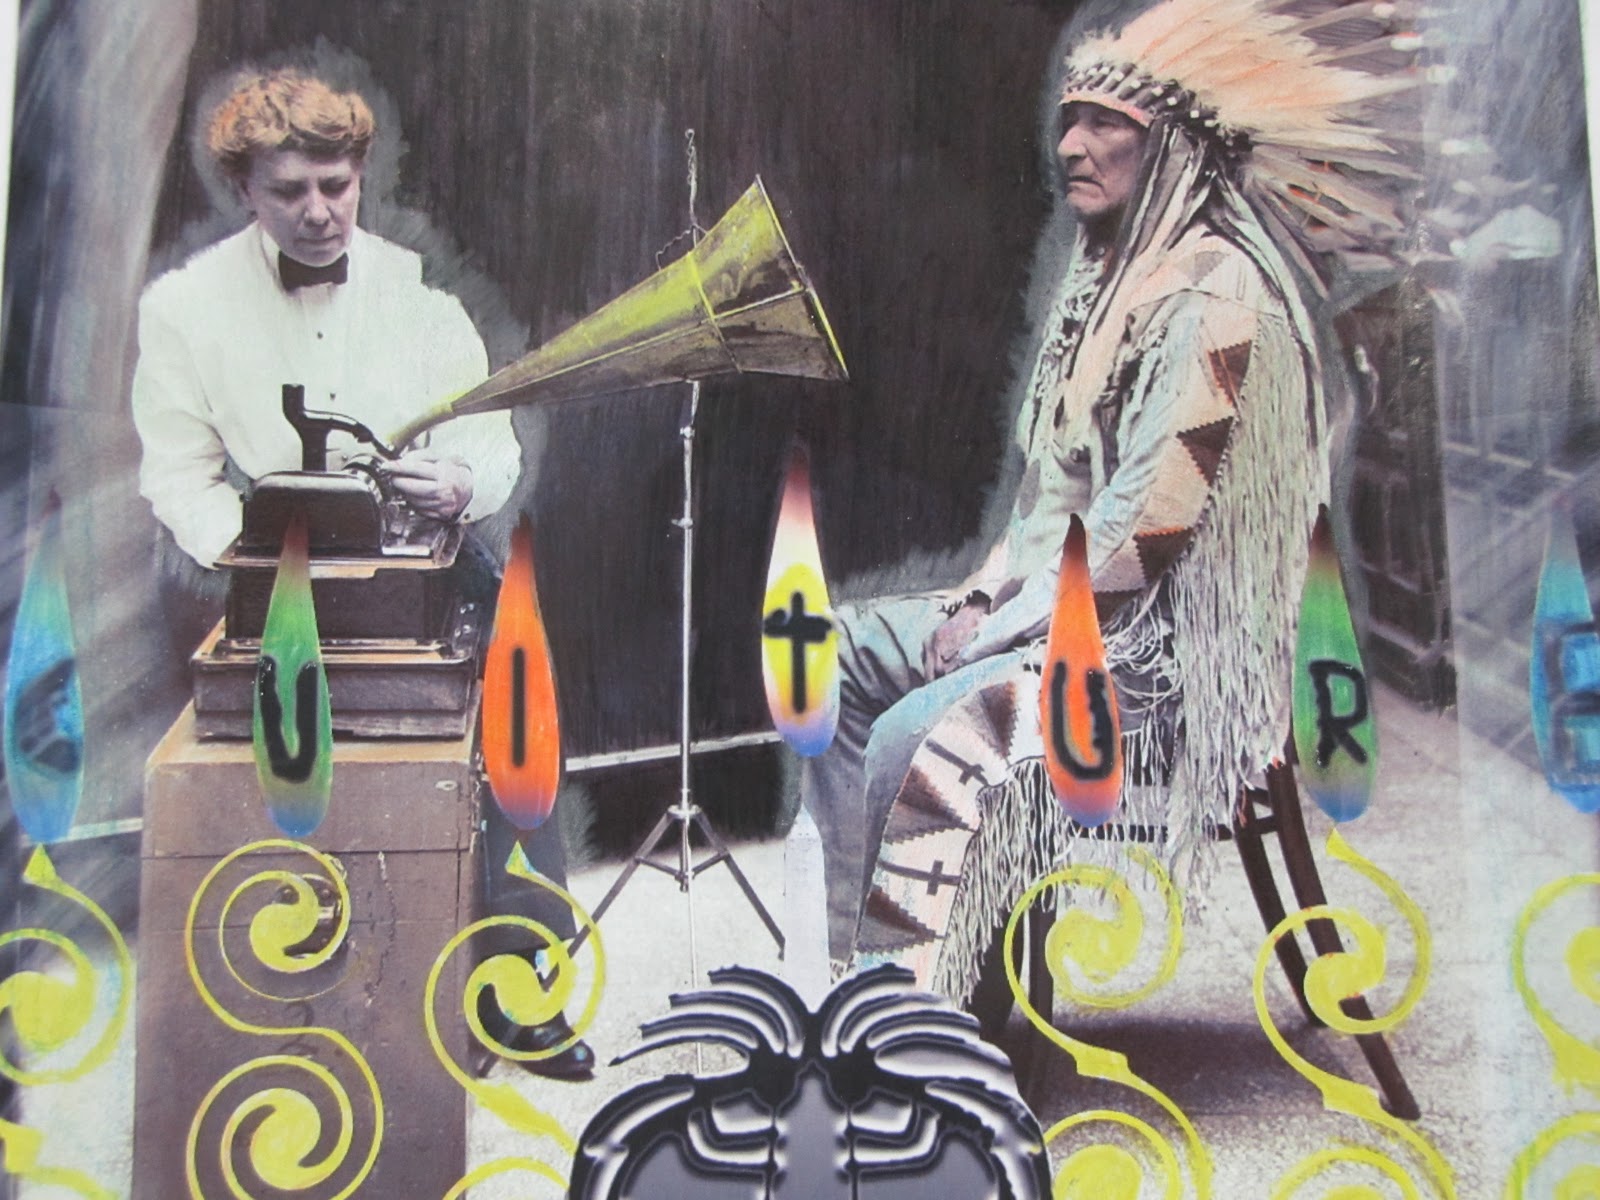
Jose worked on adding images to a old photo of a woman taking dictation from a Native American chief.
Patrick spent the second day working on an image of a lion. He was swirling out the edges of the lion's body which was giving it an otherworldly quality.
Aubrey was altering a picture of some strange-looking old-fashioned circus people. He added color and pasted some industrial buildings into the skyline.
Tenzin's boxing guys were turning into superheroes and he was planning on adding some effects to make them look like cartoons from the 50s or 60s.
Leija was combining several different photos, including photos of his friends, to make vampire creatures.
Kim brought some of her own drawings, which she had photographed and wanted to try working with in Adobe Illustrator.
Jeremy's artwork was based on an old photo of a smiling small person.
Eddie's piece shows thoughtful, careful work. He printed out a picture of a kindergarten classroom after the Chernobyl Disaster of 1986. He almost seamlessly transposed a photo of a child from the early 20th Century onto it. He worked really hard to cut out that image of the child and he pasted it on so that it looks like the child is holding the bar of one of the cribs.
Natalia used the collage technique on a digital image of a child in a forest. It has a fairy tale feel to it.
Jose worked on adding images to a old photo of a woman taking dictation from a Native American chief.
Patrick spent the second day working on an image of a lion. He was swirling out the edges of the lion's body which was giving it an otherworldly quality.
Aubrey was altering a picture of some strange-looking old-fashioned circus people. He added color and pasted some industrial buildings into the skyline.
Tenzin's boxing guys were turning into superheroes and he was planning on adding some effects to make them look like cartoons from the 50s or 60s.
Leija was combining several different photos, including photos of his friends, to make vampire creatures.
Kim brought some of her own drawings, which she had photographed and wanted to try working with in Adobe Illustrator.
Jeremy's artwork was based on an old photo of a smiling small person.
Eddie's piece shows thoughtful, careful work. He printed out a picture of a kindergarten classroom after the Chernobyl Disaster of 1986. He almost seamlessly transposed a photo of a child from the early 20th Century onto it. He worked really hard to cut out that image of the child and he pasted it on so that it looks like the child is holding the bar of one of the cribs.

Aubrey's image is impressive too. He added smokestacks and pollution and then colored his whole image to look like a smoggy day.

At the end of the second day, all the students were coming up with very interesting work, and I was really looking forward to watching the images evolve during the third session and to seeing the final results.
On the third day, we began with a quick and very effective lesson by Cristina on how to connect to an ITA network drive, where students could access, store, and share their work. Then, we spent the rest of the day working on our artwork. The students have all created some FANTASTIC pieces:
Kim had scanned in some of her own artwork at home, then she added a background in Adobe Photoshop and created an interesting cherry blossom design for her figure's clothing.

Kim's Cherry Blossom Kimono Picture

During the second week of class, Patrick unfortunately lost his first lion picture; he had not been saving his work and there was a problem with his computer, so after he rebooted, he was unable to retrieve his really great work. But, he did not let that stop him! He learned from the experience (he was saving constantly while working on his second picture!) and he created ANOTHER AWESOME one, done mostly in Photoshop. He added wings to the lion, and then put the whole figure into a completely different background. I really like the arc of light on the right. Very effective image and fantastic learning experience--way to go Patrick!!
Natalia's Child in the Woods is really fabulous too:

This is not her final product, though, because she has been adding some cut-out collage that really creates some interesting effects . . . those woods have eyes!
Juan finished his image of the Chief and then added some coloring effects on the final product. He used colored pencils on a print out, which he blended with his fingers. This made the surface smooth and glossy, adding an interesting dimension to the picture. After that, he scanned in his entire final product:
Jeremy used Photoshop and added construction paper collage to create a very amusing character:

Tenzin finished his image of two men boxing:

This custom workshop has been a success: everyone learned a lot, had some fun, tried something new, and made a project he or she can be proud of. As an instructor, I found it rewarding to share my own talents with the students and show them how technology can be part of our lives in an interesting and exciting way.
I love these images!
ReplyDelete