Friday, December 9, 2011

Cereal Box Design

April Arevalo
- ITA Tech Instructor -

Elements of graphic design can be found everywhere. What better way to teach the students about all the elements of graphic design than by making themselves into what, I hope, gives them the copious energy they have every Saturday morning; a cereal box.

The purpose of this project was to advertise each student in a complete styling. The students didn't necessarily have to be a cereal product, but some students did get creative by adding many aspects of them as a real cereal brand.

The cereal box was split up with each session focusing on a different part, and mastering the same tools that could be applied to the entire cereal box.


Front of the Cereal box:
On this side, the students created digitized self-portraits of themselves. The main tool used for this was the pen tool, a very useful but challenging tool. The students learned very quickly that, while frustrating, this tool can create great, detailed artistry. Starting with a picture of themselves, the students essentially traced over the picture to recreate the image. Still, they would tell you that it is not as easy as it seems. The pen tool requires a keen eye, an understanding of anchor points of curvature of a line, and the use of layers.

After practicing this tool several times, the students were able to tame it and create digitized versions of themselves that looked great.This is a picture of a student, as a final digitized image.


Back of the Cereal box:
In this section, the students created a typographical map of their neighborhood and nearby areas. This section again focused on the pen tool but introduced new elements such as a "clipping mask" and "type to path" tool. The students really developed their pen tool skills in this section. In order to make a typographical map, the students would outline the shapes present in the image of their neighborhood. Then, they would use a new layer to write text of the area they were covering up, i.e. parks and street names. Then, selecting both layers, they would create a clipping mask that would cut the text to the shape they outlined and color it as the shape was colored. The students repeated this for each section of their map.
This is a map of a student's neighborhood entirely made up of text.

Sides and Panels of the Cereal box:
After giving the students a very structured front and back of their cereal box, they were given more freedom for the rest of the box. Keeping in mind that they were creating a cereal box, many of the students created "nutritional facts," based on what makes them who they are. They also started to think of images that could portray aspects of importance to them, such as religion, school spirit, and other things of interest.
These are the side panels for another student's cereal box. She chose to draw her journey at ITA on one side of her cereal box.

For the final result of the cereal box, the students were asked to think about color schemes throughout the box and overall presentation. They are portraying themselves and need to think about what makes something aesthetically pleasing. The majority of students still have some tweaking to do, in order to make their boxes as presentable as possible. In using a website known as "dropbox" the students are able to work on their projects at home and can send us a complete cereal box that they put time into and would be proud to show.

The students came a long way and have begun to understand what it takes to make a complete piece of work/art. This is a great structure for the projects to come in their ITA career.

COMING SOON:
Below are some photos of the actual cereal boxes! We displayed them at this year's 12th Annual Holiday Luncheon:

Wednesday, October 26, 2011

Exploring Aviary

Felipe Gacharna
- ITA Tech Instructor -

For the October 22nd ITA session, students had the option to join a choice session that explored Aviary. Aviary is a free online set of tools that allow for image editing and creation as well as music editing and creation. In particular, students got to explore the Phoenix photo editor, similar to Adobe Photoshop, the Raven vector editor, similar to Adobe Illustrator, the Myna music creator, similar to Sony ACID, and the Peacock effects editor, which is unlike most programs the students have experienced before in ITA.

All the Aviary software runs in a browser and is free for anyone to use! We used the specialized education version to great success, which allowed us to oversee much of what the students were able to accomplish in this session.

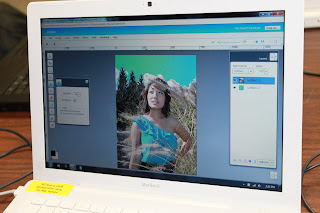
This student was very proud of the work she could do to her photo in a web browser software:


Phoenix (like Photoshop)


Phoenix has many of the same features that students have already learned in Photoshop, including layers, blending modes, filters, and the clone stamp tool, to name a few. In Phoenix, students got to play around with a base image of a hot air balloon that I provided.

Using the hot air balloon image, students were able to duplicate some of the functionality they are familiar with in Photoshop and then take it to another level with the Peacock effects editor.

Peacock (a unique photo editing tool)

You can "push" a layer from Phoenix directly to Peacock, edit the layer in Peacock, and then send it back to Phoenix. Here are some pictures of the edited hot air balloon image as well as a screen shot of the Peacock editor, showing the unique user interface.


These edited balloon images showcase some of what you can do with Phoenix and Peacock.


This screenshot of Peacock shows the "node-based user interface" that the tool uses. It's a rather unique user interface (UI) where the user is provided with "nodes" or blocks which they can manipulate. Nodes can be connected through the little "notches" on the top and on the bottom of each. These "notches" are inputs and outputs. Manipulating the inputs and outputs to each node allows for heavy manipulation of images, and since each node has its own properties that can also be manipulated, the user has a lot of power in creating a desired effect.

Here's another screenshot of Peacock showing the nodes more clearly and some manipulation done to a gradient.


Myna (sort of like Sony ACID or a drum machine)

The Myna music creator allowed students to mix sounds from a large library to create beats. Myna provides a simple interface, with several layers of different sounds and each sound having a track, with beats being on or off for a given beat. Volume can be tuned for each sound as well as for each particular beat, so students have a good amount of power in mixing their beats. Here is a screenshot of one of the beats created by a student as well as an over-the-shoulder picture of one of the students working on his Myna project.


Listen to some beats the students made:


Aviary also provides a Hall of Fame where anyone can look through submissions, as ranked by users. Most of the time, the projects actually allow you to open up the program used to create it so that users can view how the project was created. Students had an opportunity to look through the Hall of Fame to see what could be done with the tools they were using and to help them gather ideas of how they could achieve some effects in their final artifacts by looking through the projects that allowed you to see how they were created.

Introducing: After Effects

April Arevalo
- ITA Tech Instructor -

After Effects is a complex program that has endless possibilities of what can be created. I tend to focus a lot on text, not just what the text means but also the aesthetic feel of the text. This session I wanted the students to become familiar with the navigation and some of the functions of After Effects. The plan for this session was to give the students a basic structure of how to do a space warping text. Once the structure was complete, the students had the freedom to enhance their animation with a variety of options.

Although I felt the structure was confusing at times the students had no trouble in asking for clarification and getting back on track. Because of the complexity of this software, I had to be pretty strict about exact values for many parts of the project. However, the students were clever and had their own interpretations. They successfully came up with different text paths, styles, and compositions. This picture is a sample of a movie title as it enters the time echo effect that causes it to look like it is warping.

Once the structured part of the lesson was complete and the students were introduced to backgrounds with masks and the particle world the creativity really began to flow. Approaching these two elements in more of a broad sense while still highlighting major components really played to a key aspect when using After Effects. Creating effects that are visually engaging in this program calls for experimenting or simply just playing around with the effects. The difficult part is that it requires a lot of computer processing power, so it can be a little slow going to experiment and see the results right away.

As the students dove into adding backgrounds and different particle elements it became clear that the structured part was needed and that this freedom would add another level of complexity to what the students had already made. This student made something simple look very cool and colorful.
Overall the students engagement, curiosity, patience, and creativity really made this session more than I had ever anticipated. Hopefully since this was the first session ever to use the program After Effects when other sessions are offered the students will be excited to learn and create what ever the focus of that session happens to be.

Annual ITA Halloween Costume Contest delivers more treats than tricks

Alison Wilson
- ITA ACT and College Prep Instructor -

Each year, ITA encourages students to look deep within themselves to come up with the BEST Halloween costumes possible. While few students participated this year, the costumes did not disappoint. Not only did these students have the opportunity to go trick-or-treating in each of their classes, but ITA staff was on the lookout for the most creative, fun, inspiring, or well-executed costumes.

Without further adieu, I present to you the Halloween Costume Contest participants of 2011!

This student sported the unofficial uniform of the US Women's soccer team.


The classic masquerade mask for a sophisticated costume. Also, she loves trees...


It was impossible not to smile when walking past Dipsy, the green Teletubby.


Here is a very convincing crusader, complete with sword and chainmail!


I’m not even sure who this ninja was; this costume was just that good!


Wow! Nice interpretation of Raggedy Ann, red Converse and all! You rock!


Arrrrrr, mateys! This here be another ITA student as a pirate!


We even had a mime costume. And, some nice miming talent along with it!


With so many AWESOME costumes, it was difficult for staff to choose the winners. In the end, it all came down to just a few votes…

Our runner-up is a TIE between Dipsy and Raggedy Ann. Each of them will receive a $20 Best Buy gift card!

This year’s costume contest winner is the robot from LMFAO’s “Party Rock Anthem” music video. He will receive an iPod shuffle and a $15 iTunes gift card!


A huge thanks to Mary, Sarah, Brianna, Brenna, Ian, Ninoska, Adrian, Josh K., and Islam ! You will each receive a raffle ticket for the End-of-Semester prize raffle!!

Photos by: A.J. Daughtry Krill

Sunday, October 23, 2011

Computer Security

For the first choice session of the year, a workshop focused on computer security titled Hack This! was offered.  The session began by looking at a comparison of families of operating systems.  A diagram of UNIX and Unix-like systems can be found here.

Here are some of the major topics we covered in class to give students a better understanding of how computer security works, and how to stay safe in a deeper level than we usually have time for...

Windows Password Security
Losing a Windows password happens quite often, especially when the user is no longer a part of the organization, or has simply forgotten the password for the only administrator account on a rarely-used system.  There are several options, which you can research on your own. Our students got to try a few. It was helpful for them to learn just why it's so important to have not only a good password, but other layers of protection as well.

Mac Password Security
Mac has the reputation of being pretty secure and safe, but their efforts to be as user-friendly as possible and building everything on a UNIX platform platform have left some vulnerabilities.
In order to gain access to a Mac with a lost administrator password, the best way is to use the Mac OSX Install disc that came with the computer. There are other ways to secure your Mac and help you to remember your password that the students had a chance to discuss as well, including encrypting actual files as well as the OS.

Cracking file-level passwords
While we discovered that user passwords for operating systems are rather unsecure, password encryption for files can be very difficult to crack. We looked at the differences between methods of password cracking, such as Hash decryption, Dictionary set, and Brute force.  More information on these methods can be found at: http://en.wikipedia.org/wiki/Password_cracking

Students had a much better understanding of how threats to security occur, and they learned the importance of being very careful when storing information, especially sensitive information.

Live CDs
We booted our computers using Puppy Linux and Knoppix, though we discussed the use of even more alternatives, such as Ubuntu derivaties that can run live, as well as BackTrack, DEFT, and MilaX.  A more complete list of LiveCDs can be found here.  These live CDs are ways to boot a computer with a non-functioning operating system and access the hard drive.  They are an important part of any IT toolkit for retrieving data and also running a full virus scan that can check for rootkits while the primary operating system is offline. With these tools, students can learn a really safe way to recover important work they thought they had lost to a virus or other OS corruption!

Internet Security
We took a tour of www.whatsmyip.org to explore some of the information that is passed on to a website about every visitor and ways that one can protect a computer against malicious attacks by testing what vulnerabilities exist.  Using this website, we were able to discuss how to make passwords more secure, geolocation, proxy servers, MD5 checksum.  This also led to a discussion to ports, firewalls and creating a DMZ using a dual-firewall setup.

In the End
Of course, our conversation went to all sorts of places, and our students seemed to learn and share a whole lot about the way computers work, the way to work around that, and most of all the importance of having a better understanding of this still somewhat new frontier of online life.

Thursday, September 1, 2011

Back to School Technology Preview...

This year at the IT Academy, students will have the various opportunities to enjoy and learn about all kinds of things!

Here is a list of some of the things we have in store for the Technology Labs:

Poster Mosaic: Each student creates one piece of a whole illustrated poster!
"Campfire Tales": Creative storytelling through digital audio!
Social Justice Social Media:
Students bring a cause and learn how to effectively educate others about what they care about!
Self-Portrait: Illustrate your self or your friends in creative ways!
Accessibility and Assistive Technology: Creative journey into how technology can help in many, many ways!
Using AfterEffects in Post-Production: Learn ways to use AfterEffects to adjust the video you've captured and add the subtle visual qualities that can transform the viewer experience. 
Space Text: Moving typography in film using AfterEffects!
Going Green: An exploration of the green movement in technology!
Hack This: 
Not that kind of hacking... learn to make technology work for YOU in ways it wasn't necessarily designed for.
Data Visualization: Learn about the unusually fascinating and exciting world of visualizing data!
Audio Equipment Virtualization: Using virtual synthesizers, drum machines, patch cords, and effects racks -- ON A BROWSER! http://audiotool.com/app
Polyvore Magazine Layout: Learn some of the tricks of the trade in magazine page layout, using a super cool and fun website! http://www.polyvore.com/
Commercial Fun! Make short (50 seconds or less) commercials, focusing on storyline and product placement.
How DOES that work? Ever wondered how that worked? Learn some tools to find out!

It's going to be quite a semester! Keep looking out for future updates and see the amazing work of our students as these workshops unfold!

Monday, August 8, 2011

Dear Many Uses Students, Thanks for a Great Audio and Video Day

Ann Tran
- ITA Tech Instructor -

The third day into The Many Uses of Computer Camp started with the students discussing their favorite genre in music. A lot of the students listened to Rock, Oldies, Hip-Hop, and R&B.

Then, they immersed themselves into a free music creation program called "Roc" on aviary.com to compose two measures of rhythm starting with a kick drum, snare, and various other instruments. All of the students, with or without musical background, had their own unique beat. After, they used Sony Acid to add a bass line and record a voice over. In the voice over, the students composed a thank you note to the ITA students and staff for being accepted into the program.

With their audio good to go, the students dived right into Adobe Premiere, a video editing program. After an hour, the students were able to piece the video together with pre-filmed shots of the first couple days of them at ITA!

In only three short hours, the students transformed into music producers and video editors! It was a ton of fun!!

NOTICE: Video coming soon!

Wednesday, August 3, 2011

Many Uses of Computers Camp 2011: Graphic Design or Photography?

Cristina Lor
- ITA Tech Instructor -

The second day of class was another great experience; were so into their Adobe Photoshop and Illustrator projects that they spent their break time working on them.

The said projects include their “Layers of Me” which was created in Photoshop. In this project, the students had to import their portrait into Photoshop and then add multiple layers, categorized in the folders named “Culture”, “Hobbies”, “Name” in which all text found in the folders related to each of the folder name. They had the chance to change the font size, color, family, effects, and location of each text box.

Their illustrator project revolved around family, but in the form of penguins! In this graphic design portion of the session, the students were to use premade symbols to assemble penguin versions of their family.

Here are some class examples:


During the third hour of labs, the Evaluation unit, the students were given a mini lesson on blogging – capitalize proper nouns such as, Adobe Illustrator and Photoshop, and utilizing the power of the Enter/Return key whenever a new thought is formed! Once the mini lesson was completed, the students dove into finishing up projects, catching up from the day before, or blogging.

Looking at how fast the students picked up on both of these programs illustrates how the instructors were getting more comfortable with the students, even after only two days!

Tuesday, August 2, 2011

Motion Pictures Camp - Day 2

Luis Perez
- ITA Tech Instructor -

We started the day off by having one of our instructors, Tony, give a lecture based on the History of Film and how it impacted the United States. He talked about famous stars such as Charlie Chaplin, John Barrymore, and Florence Lawrence. He also talked about what goes into production and the seemingly endless roles and positions to fill, from makeup artists to screenwriters. It all served to paint a more in depth picture of film for the students.

With gained knowledge and practice, students were given more time to finish their "ambiguous dialogues", which required a little bit more filming and quite a bit more editing. During this time each group of students could leave the class room with their assigned instructor to film in a different location or in the same location they chose yesterday. Instructors made sure that the students realized that there was always more they could do, to get that perfect shot. Film is in a constant flux of re-shooting and re-editing.

The students then went back into the labs and added pictures to their videos, along with extra sound effects and titles to get even more hands on with Premiere.

After a given break, students all gathered into one of the labs to be introduced to this year's Blitz. The Blitz is a project that groups of students do along with an instructor based off a theme, and this year's theme is "All Dressed Up, and No Place to Go."

Note: The theme for the Blitz is really only to get some ideas about it, but in the end, the films may stray from the Blitz due to time restrictions :)

In no more than 24 hours time, the instructors will write and direct a film with the help of their student collaborators, all while sticking to their theme. The students have 15 minutes to talk with their instructor to plan out what they wanted to do and how they are going to get it done, whether that meant planning a script or collecting props for the shoot. Either way, the Blitz is sure to cause a very hectic and fun day tomorrow at Motion Pictures Camp!

Monday, August 1, 2011

Many Uses of Computers Camp 2011: The Introduction to Labs, Labs, Labs!

Today was the first day of the Many Uses of Computers Camp for the new cohort of ITA, the class of 2015.

The 30 students began their lab with an introduction of themselves, the ITA instructors and interns, and then continued to learn each other's names with the Drop the Sheet name game.

After the introductions to staff and students, the class was split 15-15 and proceeded to their assigned labs for the rest of camp. This assures that each student can be helped and not lost within a large group.

Upon arriving in the appropriate labs, the students talked about their technology story - what kinds of technology they have experienced working with, and then dove right into learning about the accounts that they would have to navigate with and around for the next four years of ITA: Google, Wisc, and Panda.

Once the students knew what these programs were, they began exploring each one of them as they set them up.

The first day ended with an hour of storytelling, but not the kind where the instructors sit up in the front of the room and read to the students; instead, the students were guided through a memory activity where they were to recollect an event in their life... their 8th grade graduation. This was their first blog post and beginning of the documentation of their next four years at ITA.

Welcome Class of 2015! You will do great things!

2011 Motion Pictures Camp off to a great start!

Today marked the start of the Sophomore Motion Pictures Camp.

In the early morning, students showed up for their first introduction into film making including a range of topics from cinematography to editing to acting. Classes were separated into two halves, so each student could focus in on a particular skill in acting or directing.  

Activities sought to provide the basic opportunities to be creative whether through improv acting exercises or the details of shot composition and the editing essentials of Adobe Premiere. After a short break, the two halves were brought together to collaborate on short "ambiguous dialogues." These are scenes in which all the groups have the same very simple, confusing dialogues and they need to work on their acting and planning skills to make it make sense to the audience. In other words, their interpretation is key to the success of the exercise. We did this in order to not only build their skills, but to create a sense of the team environment, and be a safe outlet for creativity in film making.

It was a lot to digest in a short period of time, but the students were up to the task and getting involved with their projects in preparation for their final films.

We hope we can post some of these dialogues tomorrow, when we expect to have them finished!

Monday, March 28, 2011

Stepping Towards the Future

April Arevalo
- ITA Tech Instructor -

I feel that having the students thinking about speech, dialog, words and how they can be used to express feelings, thoughts, the past and present is a great way to develop clear and meaningful messages in student projects. For me personally being able to write down what has occurred in my life is a huge tool to help me reflect on what I've accomplished, and how I can change my future. Lately I have been thinking about inspirational words and how to incorporate technology to display something positive. I recently thought of doing an "inspirational word" poster in Adobe Illustrator. I think it will be a great way for the students to realize that being creative and original and having fun and is a key part to portraying a strong message.

When students get to create in a way that involves colors and different aspects of "art" they don't necessarily see that a message is being formed. When more than one glance is taken, thousands of messages can be portrayed, ones that they hadn't thought of the first time. I saw this to be true while I assisted in the Mandala Custom Workshop. The students seemed to be creating things that were captivating to the eye and at a second glance deeper messages were shared. There were themes of nature and the beauty of the universe. Projects like this are beginning to open the minds of the students to something more than just doing projects because they have to.

By coming up with clearer messages, I feel the students will appreciate what they are creating a lot more and pursue future creation on their own.

Thursday, January 27, 2011

Prezi: Prezident of Prezentations

Marc Pedone
- ITA Tech Instructor -

The goal of this choice session was to give the students an opportunity to learn about some new presentation tools available.

We started with comparing Prezi to Microsoft PowerPoint by making a presentation of our favorite celebrities, first in PowerPoint and then challenging ourselves to make the same presentation in Prezi. By doing this, we were able to evaluate the pros and cons of each program.

After the students got a handle on Prezi, they were introduced to Prezi Meeting. This feature allows multiple people to collaborate on one presentation at one time from different computers connected to the internet. As a group, they planned out what they would present and how they would do it. On a white board, they planned the best way to present the city of Madison to someone else.


Monday, January 24, 2011

Senioritis? Not With These ITA Seniors.


Almost half way through the class of 2011's last year at ITA, the seniors are showing no signs of lack of motivation, procrastination, drop in lab performance, or "coasting" through the afternoon. These symptoms more commonly known as senioritis fail to be observed at ITA with this year's excellent students. The students have already shared their proposals for their project at the Holiday Luncheon. For those of you who could not attend, here is a brief re-cap of what the seniors are doing.

Protein Tubar Video by Thor and Thuy Dan
Thor and Thuy Dan are working with Professor Dave Nelson from the department of biochemistry here on campus. They taped an instructional video of Professor Nelson using the Tubar Protein Modeling Kit for SMART teams at Madison West High School. SMART Teams stand for Students Modeling A Research Topic, an extra-curricular activity that introduces high school students to the field of biomolecular research. This video will be used for teachers in the program as a demo of how to use Tubar Kits.

Flash Animations by Eddie and Jeremy
Eddie and Jeremy are creating complex Flash Animations for Professor Sebastian Bednarek of the department of biochemistry. From the pictures on the side you can see their drawing progress thus far. Eddie is working on cell membrane trafficking (on the left) and Jeremy is working on clathrin mediated endocytosis (on the right).

Scientific Demos by Noah and Maya
Noah and Maya are taping scientific demos for the biochemistry course "Exploring the Biomolecular World" taught by Professors Dave Nelson and Michael Patrick. The two scientific demos that Noah and Maya will be filming is a short video on the hydrophobic effect and an experiemnt using Beta-Galactoside.

ITA Recap by Adrianne, Lakoye, and Jasmine
Adrianne, Lakoye, and Jasmine will be using iMovie to create short video presentations about past ITA projects. These projects will be displayed for recruitment and funding meetings to demonstrate the great work done at ITA.

Video Tape of the Crystallography Research Facility
Students will be working with one of the post graduate students working with Professor Katrina Forest. Professor Forest uses x-ray crystallography in her research to study the interactions between humans and microbes. our students' task will be to record a 45 minute video of the entire process.


Interviews of Campus Professors
Students will be venturing to different research laboratories on campus to interview professors about their work. The video's goal will be to inform undergraduate students about the various research on campus to help aid them in choosing which lab to join. The first professor the students will be interviewing is Douglas Weibel from the Department of Biochemistry.

Tutorial on Jmol by Leija and Ivan
Ivan and Leija will be using CamStudio to help record a tutorial of how to use Jmol, a protein modeling software program. They will be recording an expert in Jmol give an instructional lesson of how to use the program and then distribute this video to various science professors on campus.

Holiday Greeting Cards by Ashanti and Julie
Ashanti and Julie are using Adobe Photoshop to create custom-made greeting cards for the UW-Madison Children's Hospital. They will be printing out their designs and hand delivering them in the upcoming months.

ITA Digital Yearbook by Eileen and Kiran
Eileen and Kiran will be creating the second ITA digital yearbook. The yearbook will include fun facts about each ITA student and highlight the events from this past year. Currently, the two are in the process of taking the ITA student yearbook pictures and designing a new layout in Adobe InDesign.

Congratulations Seniors!!! Keep up the great work!

Thursday, January 13, 2011

Moving PowerPoints

Cristina Lor
ITA Technology Instructor

In the 2010-2011 fall semester, ITA devoted four lab sessions to the Moving PowerPoint workshop which was created to not only show the students how they can use simple programs like PowerPoint to create complex animations like in Flash, but to give the students a chance to create and finish a Showcase project, for this year's Showcase Presentations at Thoreau and Orchard Ridge Elementary schools.

The first two sessions housed the same five students. The small classroom allowed each student to have more time with their instructor and create quality final products.

The final products were impressive, and all the students learned a bunch about how to plan out an animation with sound effects in a way that can keep the audience interested!

Unfortunately, these animations can't be posted on the web in a way that really shows off their full-impact, so no student work is posted here.

Wednesday, January 5, 2011

Games from Scratch Session - Instructor Reflection

If you read Paul's posts about the first two sessions of our Custom Workshop on creating games from Scratch, you'll notice he points to a third, and final post...

Originally, I was going to do an update on the 3rd day of Games from Scratch. What I would rather do, considering the lateness of this post, is to update with a reflection on how the class went, and my recommendations and urging for others to help take this class into a more fruitful direction.

First off, as inferred in Paul's blog entries on this class, games are easy to create, good games are as difficult as any engineering project. Computer programming can be easy, anyone can take five minutes and print "Hello World" on the screen with a few simple commands. Making computer programs that are able to detect human behavior, constantly assess performance of the players and create an enjoyable environment is extremely difficult. Asking students to try to make good computer games using more advanced programming techniques in three classes, I found out, is borderline impossible. Not for lack of try from the students, as they were all incredibly engaged and passionate about their projects, but because of the time it takes to individually assess each student's performance levels in programming and design, and making a lesson plan that can work accordingly to their needs.

For those who are unfamiliar with Scratch, I urge you to take a look at this website and register. Take a look at a few of the games and the other programs make through Scratch. For those unfamiliar with basic game design, have a look at these interactive programs from Kongregate. Much of what you're seeing in these two instances were shown to the students as part of their curriculum. When we finally had the students modify, not design, their own games, the results were good...but to make them great, we will need to do the following.

1) More class sessions. I've taught this class before, and it has taken well over 12 sessions just to get students thinking about making board games. To get students to make a transition from thinking about games to making games, it will take more than three sessions.

2) Paper prototyping. Many of the best video games have been done previously using paper prototyping. This method of game design helps designers make cheap replicas of their virtual space without the cost, and gives them a vivid representation about what works and what does not work. This video may help provide insight into what I am talking about:


3) Promote the value of failure (reflection). I know that sounds strange, promoting failure amongst the students...but let me propose using a different word for failure that may make you feel better...reflection. You see, unlike standard testing practices in schools, when a student fails, they receive little opportunity to make up for their work, and therefore reflection is rendered unnecessary in the eyes of the student. Why reflect on what they could have done if they can do nothing to change it? Failure as a game designer provides insight into things that are not working, and if the designer is serious enough about their final project, they will change those mistakes because they want a better project. In many of the game design workshops that I have taught, one of the first things you have to do is promote constructive criticism, and teach that failure is not final, but is part of a continuing process to help make that project and that designer stronger.

I know this may sound like an unusual post. But I do take game design, this class, and the idea of collaborative learning quite seriously, and wanted to give you, the reader a honest insight into this process. Please, if you do have questions about game design, this class, or anything in my post, just send me an e-mail at rmmartinez@gmail.com or leave a comment below!